Use the form
Step 1

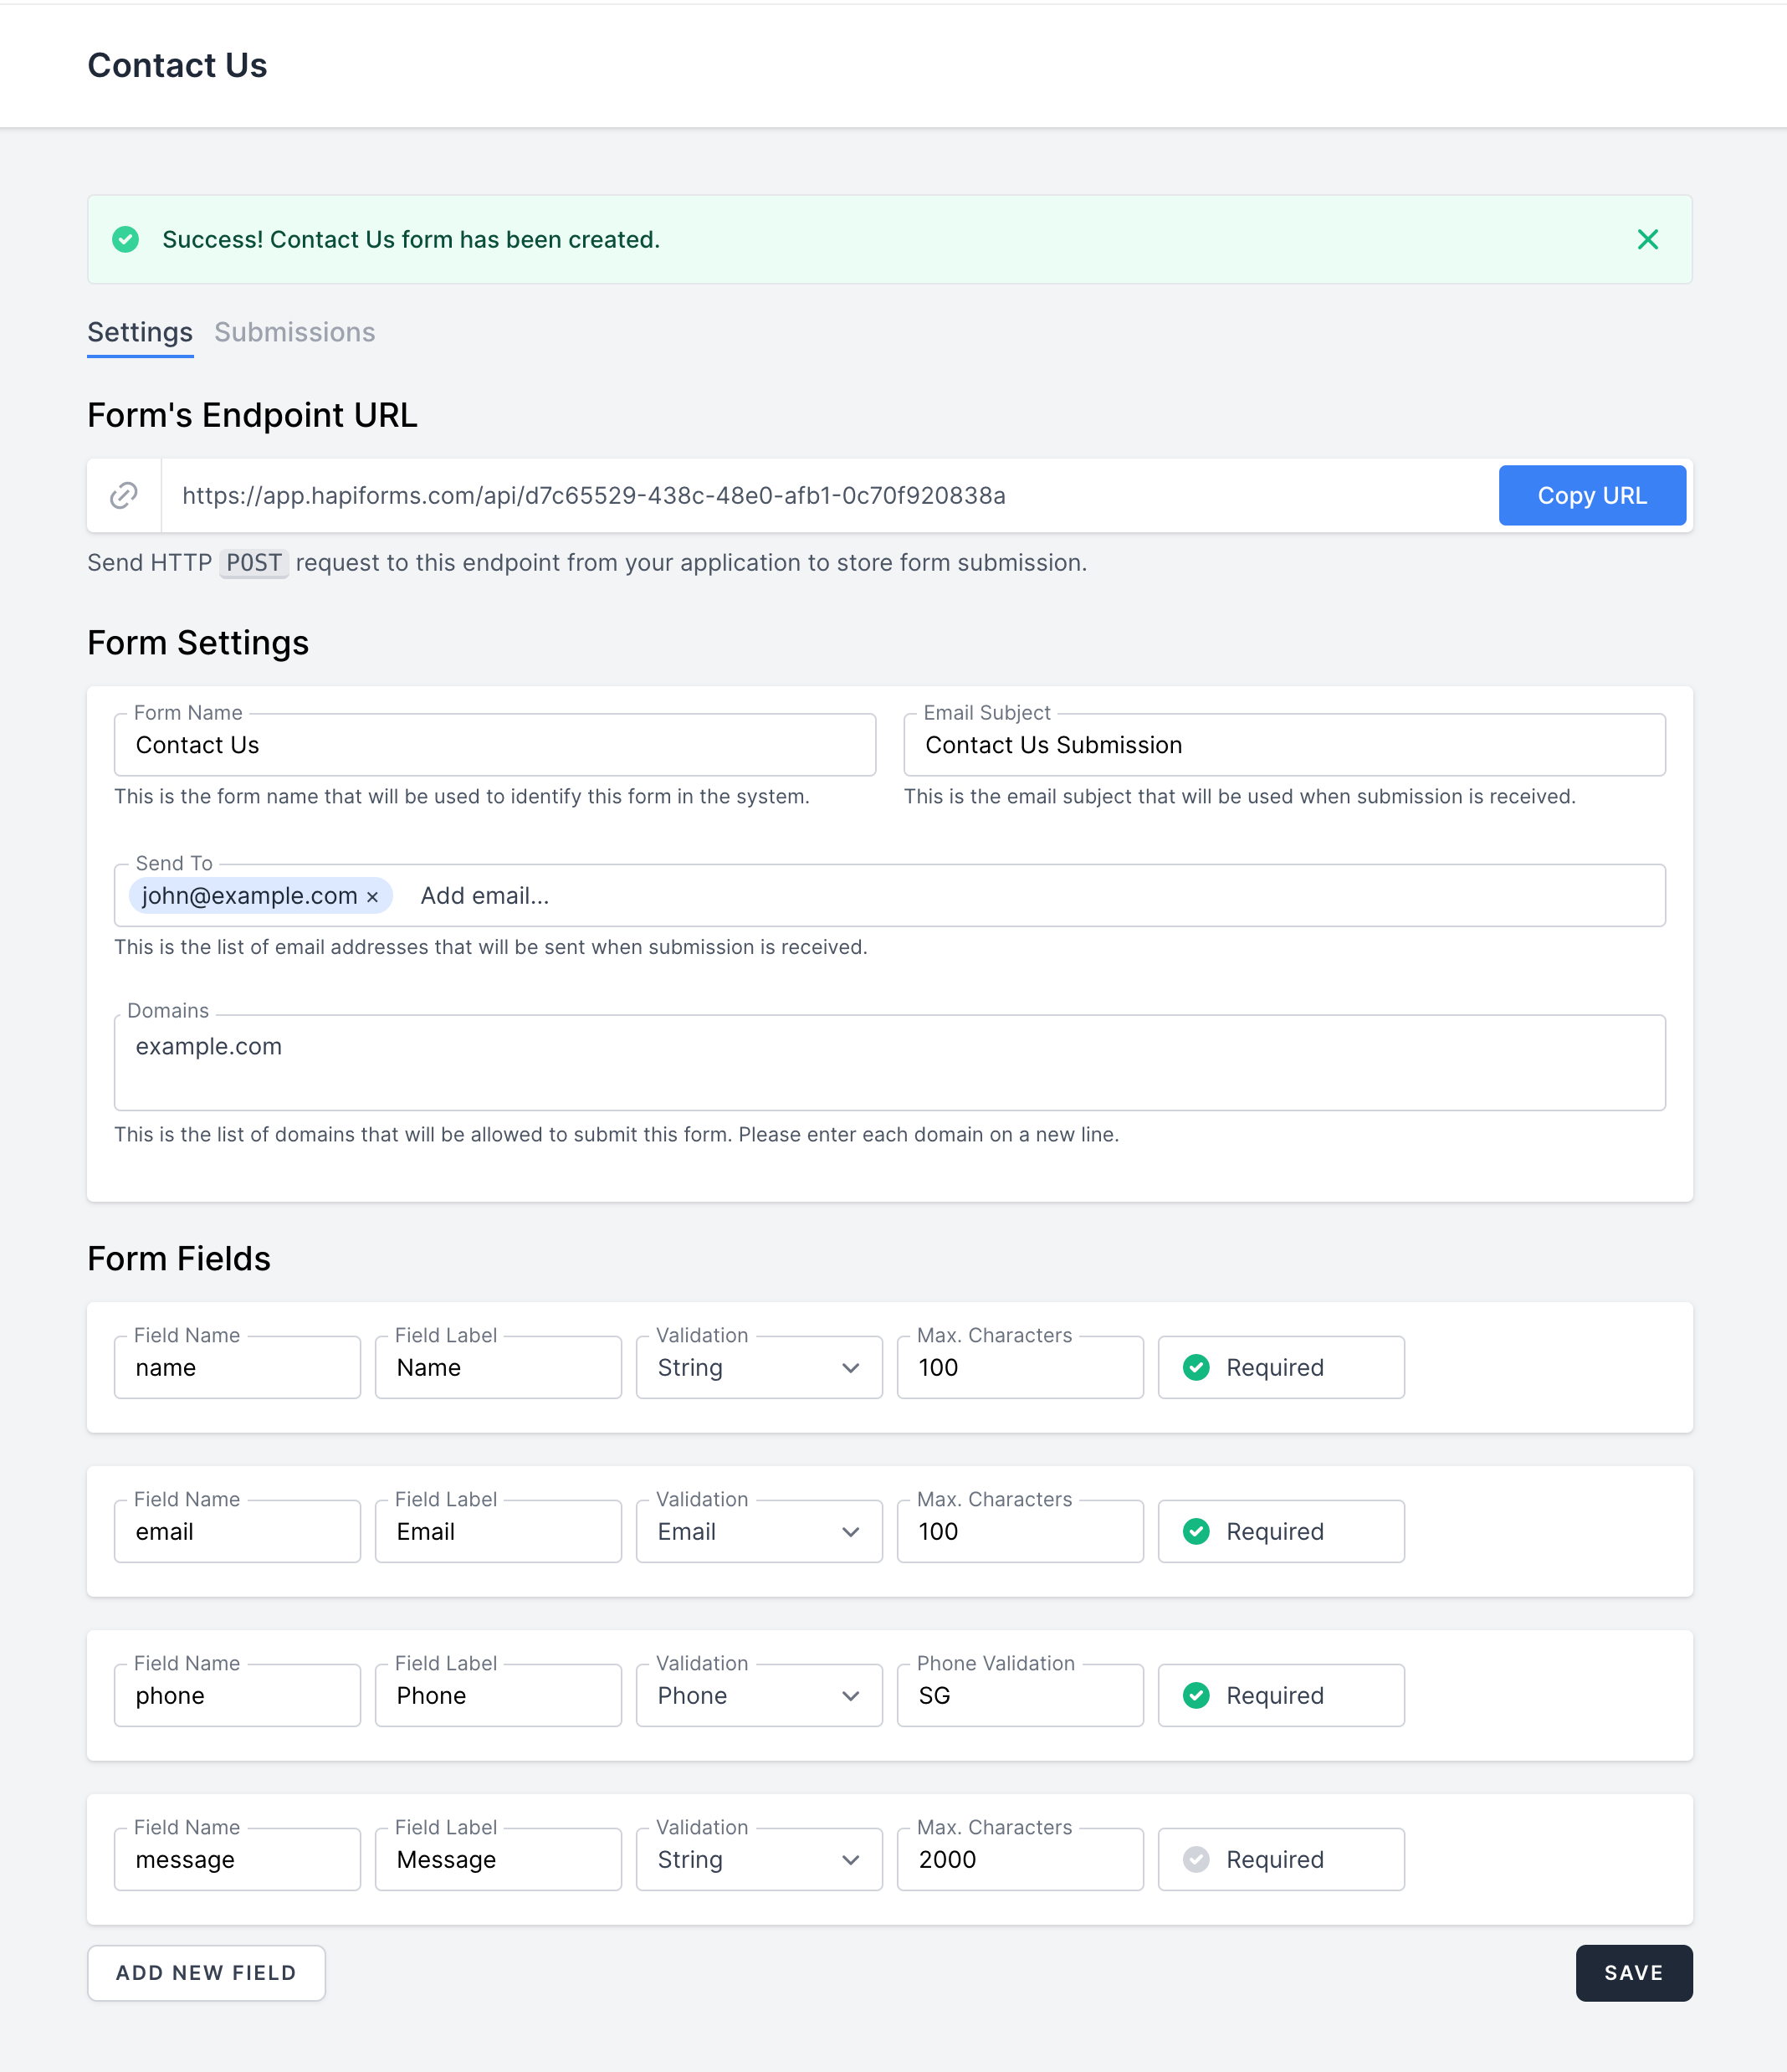
From the previous page example, we have created a form based on the criteria. An endpoint will be provided upon created.
In this case the endpoint is https://app.hapiforms.com/api/d7c65529-438c-48e0-afb1-0c70f920838a
Created Fields
| Field Name | Field Label | Validation | Phone | Max. Characters | Required |
|---|---|---|---|---|---|
| name | Name | String | 100 | Yes | |
| 100 | Yes | ||||
| phone | Phone | Phone | SG | Yes | |
| message | Message | String | 2000 | No |
Field names in blue color are the fields we are going to use to submit to the backend.
Step 2
In this example, we will use static HTML, Alpine JS and Axios JS to make the form submission.
<!DOCTYPE html>
<html lang="en">
  <head>
    <meta charset="UTF-8" />
    <meta http-equiv="X-UA-Compatible" content="IE=edge" />
    <meta name="viewport" content="width=device-width, initial-scale=1.0" />
    <title>Alpine.js Example – HAPI Forms</title>
    <script src="https://unpkg.com/tailwindcss-jit-cdn"></script>
  </head>
  <body>
    <div class="p-5">
      <form x-data="contactUsForm" x-on:submit.prevent>
        <div>
          <label for="name" class="block">Name</label>
          <input id="name" type="text" x-model="fields.name" />
          <template x-if="errors && errors.name">
            <p class="mt-1 text-xs text-red-500" x-text="errors.name[0]"></p>
          </template>
        </div>

        <div>
          <label for="email" class="block">Email</label>
          <input id="email" type="email" x-model="fields.email" />
          <template x-if="errors && errors.email">
            <p class="mt-1 text-xs text-red-500" x-text="errors.email[0]"></p>
          </template>
        </div>

        <div>
          <label for="phone" class="block">Phone Number</label>
          <input id="phone" type="text" x-model="fields.phone" />
          <template x-if="errors && errors.phone">
            <p class="mt-1 text-xs text-red-500" x-text="errors.phone[0]"></p>
          </template>
        </div>

        <div>
          <label for="message" class="block">Message</label>
          <textarea id="message" cols="30" rows="10" x-model="fields.message"></textarea>
          <template x-if="errors && errors.message">
            <p class="mt-1 text-xs text-red-500" x-text="errors.message[0]"></p>
          </template>
        </div>

        <template x-if="isBusy">
          <div>
            Loading...
          </div>
        </template>

        <div>
          <button
          type="submit"
          x-on:click="submit"
          x-bind:disabled="isBusy"
          x-bind:class="{ 'cursor-not-allowed':isBusy }"
          class="bg-blue-500 px-2 text-white"
          >
            Submit
          </button>
        </div>
      </form>
    </div>

    <script src="//unpkg.com/alpinejs" defer></script>
    <script src="https://cdn.jsdelivr.net/npm/axios/dist/axios.min.js" defer></script>
    <script>
      document.addEventListener("alpine:init", () => {
        Alpine.data("contactUsForm", () => ({
          endpoint: "https://app.hapiforms.com/api/d7c65529-438c-48e0-afb1-0c70f920838a",
          fields: {},
          errors: {},
          isBusy: false,
          submit: function () {
            this.isBusy = true;
            axios
              .post(this.endpoint, this.fields)
              .then((res) => {
                // Reset fields and errors
                this.fields = {};
                this.errors = {};

                // Disable isBusy
                this.isBusy = false;

                // Redirect to...
                window.location.href = "./thank-you.html";
              })
              .catch((err) => {
                // Show the errors
                this.errors = err.response.data.errors;

                // Disable isBusy
                this.isBusy = false;
              });
          },
        }));
      });
    </script>
  </body>
</html>
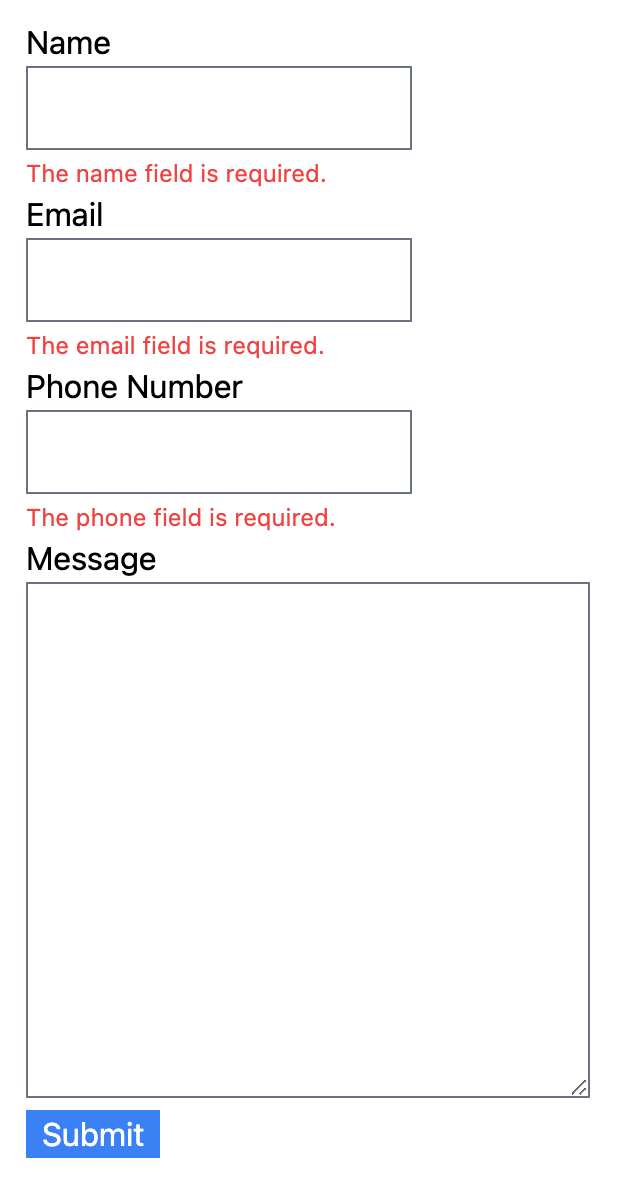
Screenshot of validation error

The screenshot above is showing the validation messages returned from HAPI Forms backend when we're trying to submit empty data to server. Let's see the JSON data below.
Sample response returned by HAPI Forms
{
   "message":"The given data was invalid.",
   "errors":{
      "name":[
         "The name field is required."
      ],
      "email":[
         "The email field is required."
      ],
      "phone":[
         "The phone field is required."
      ]
   }
}
Recap
In this example, we are using Alpine.js to perform form submission. The reason we use Alpine.js is we want to use the reactivity to submit the form and display the validation and also display the Loading... text when the form is busy with as little effort as possible.
You may use vanilla fetch() method instead of Axios.js or any other JS framework that able to make HTTP request.